Data sources (V1)
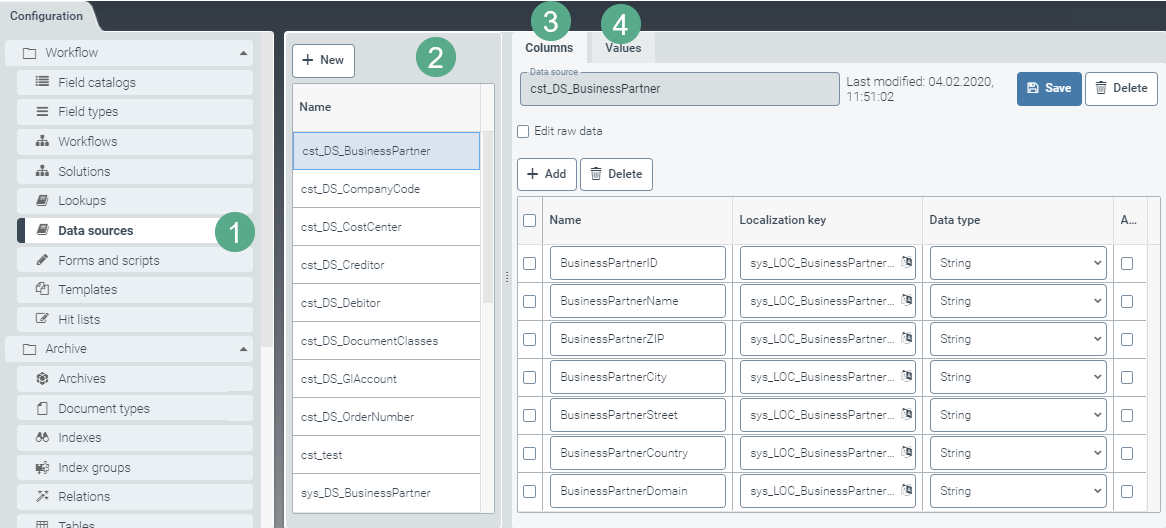 |
The Data sources screen (1) contains fields (2) and options (3) for each data source that can be edited for displayable columns (more information in Data sources — Editing column headers (V1)). The screen also offers a tab (4) that contains the actual values for each of these columns.
You can transfer the master data via xSuite Interface. If there is little master data, you can also enter details manually.
The values can also be edited. For more information, see Data sources — Editing column values (V1).
Data sources — Editing column headers (V1)
In the Data sources tab, select the data source whose column data you wish to process.
➣ The data source (1) and the column data (5) will appear in the Columns window.
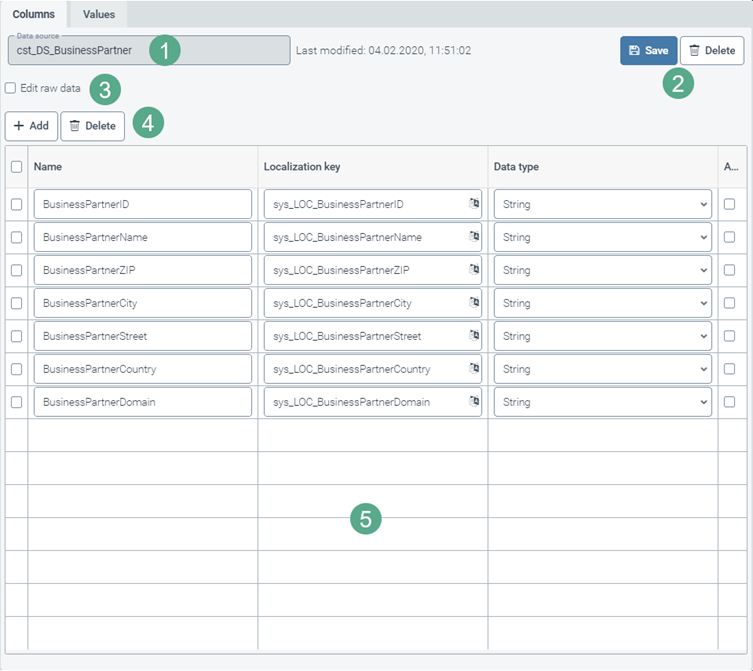
If you need to make changes to the raw data, activate the check box Edit raw data (3).
➣ The column data will no longer be editable. Neither the buttons Add and Delete (4) nor the table below them (5) will be visible.
➣ The Edit raw data tab has now taken the place of the Values tab.
For more information on processing raw data, see Editing raw data (V1).
Change or supplement the column data (5) as needed.
Column/Category
Instructions
Name
If necessary, change the column name.
Localization key
Enter the localization key for the name of the data source which is to be displayed.
To open the Select localization dialog box, click the
 button.
For more information, see Selecting a localization.
Data type
If necessary, change the data type using the drop-down list.
Possible data types:
StringNumberDate/TimeBooleanLoc. Value
A... (The element is an Array)
If necessary, activate the check box to identify the element as an array.
If necessary, add a new column name and its localization key, data type and array information with the button Add; or delete the column data by selecting one or multiple check boxes in the respective line and clicking on the Delete button (4).
Save the column data you have made changes to; or, if necessary, irrevocably delete the entire data source (4).
Data sources — Editing column values (V1)
In the Data sources window, select the data source whose column data you wish to edit.
➣ The data source (1) and the column value (4) appear in the Values window.
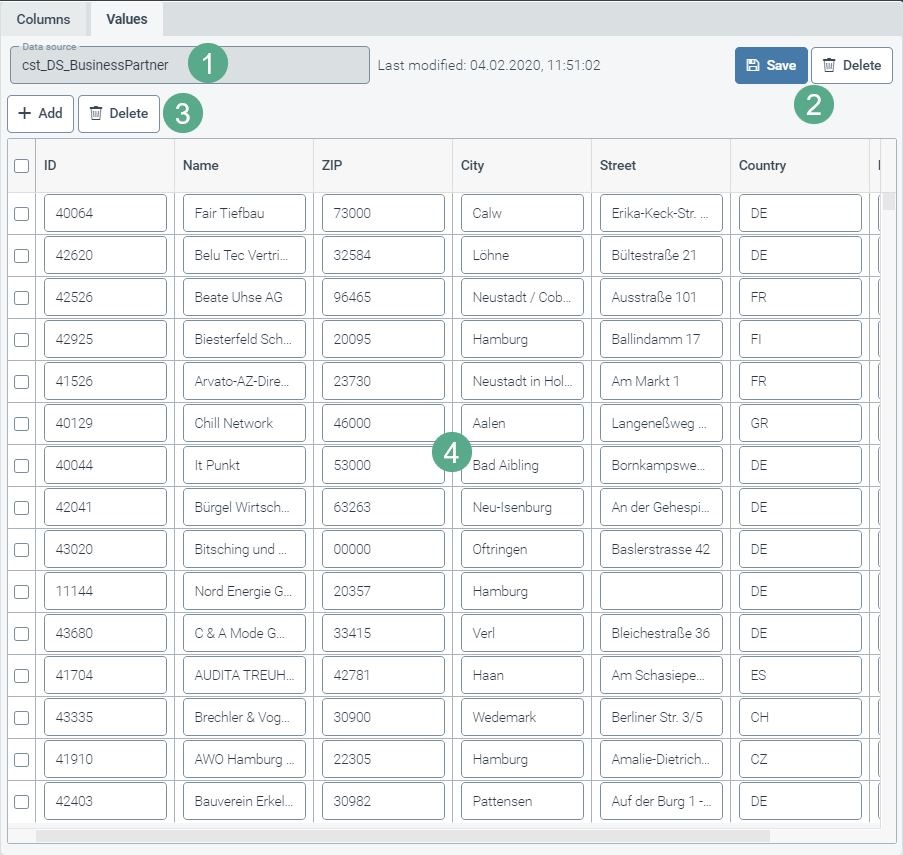
Change or add information to the column data (4) as needed.
If necessary, add new column names with the button Add, or delete column data by selecting the check box in the respective line and clicking on the Delete button (3).
Save the column values you have changed or, if necessary, irrevocably delete the entire data source (2).
Editing raw data (V1)
Select the check box Edit raw data in the Columns window.
➣ The Edit raw data tab will take the place of the Values tab.
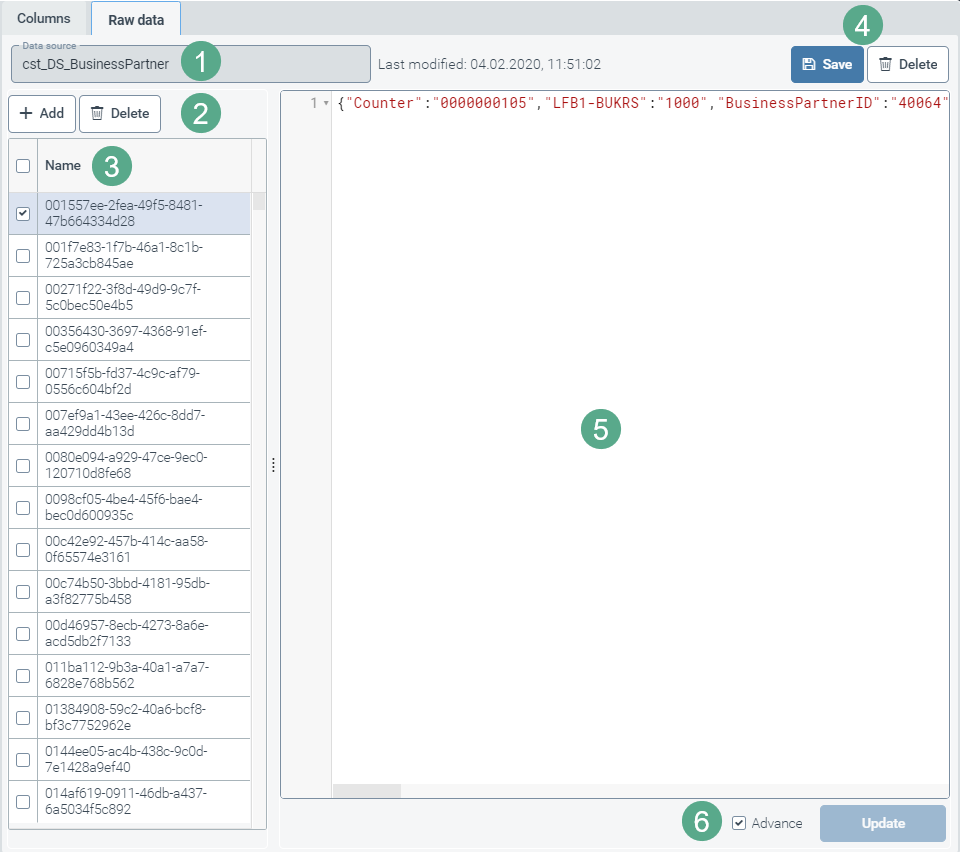
To delete a raw-data entry (3), select the check box in the respective line and click the Delete button (2); to add raw-data entries, click the Add button (2).
To add any raw data, use the blank pane (5).
Click the Add Button (6).
➣ A new entry will be created in the list (3).
Notice
To add additional entries automatically without needing to click the button Add each time beforehand, select the check box Advance (6).
To edit any existing raw data entry (3), use the pane (5).
Click Update to adopt the edited raw data.
Click Save (4) to save the entire data source including the modified and/or added raw data or click Delete (4) to delete the entire data source (1), including the raw data (5).