Creating an absence with role-specific substitutes
Go to the web client ribbon and select User Menu → Account Settings → Absences.
Your absence screen will open.
Click on
 Create absence.
The New absence dialog will open.
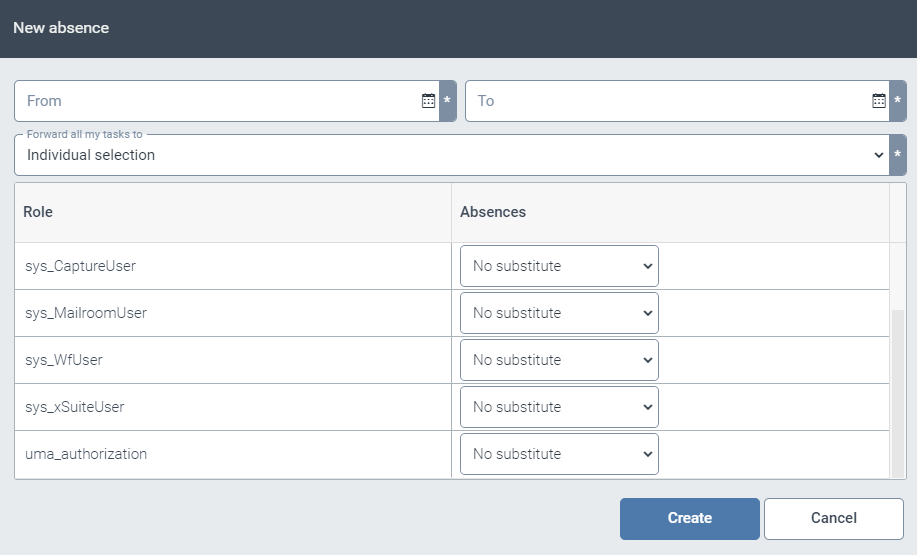
Enter the period of your absence in the From and To fields.
In the drop-down list Forward all my tasks to, select Individual selection.
For each role, define one substitute who will see all work items assigned to you through this role during your absence.
If you do not need a substitute for a given role, select the entry No substitute.
Click Create.