Workflows (V1)
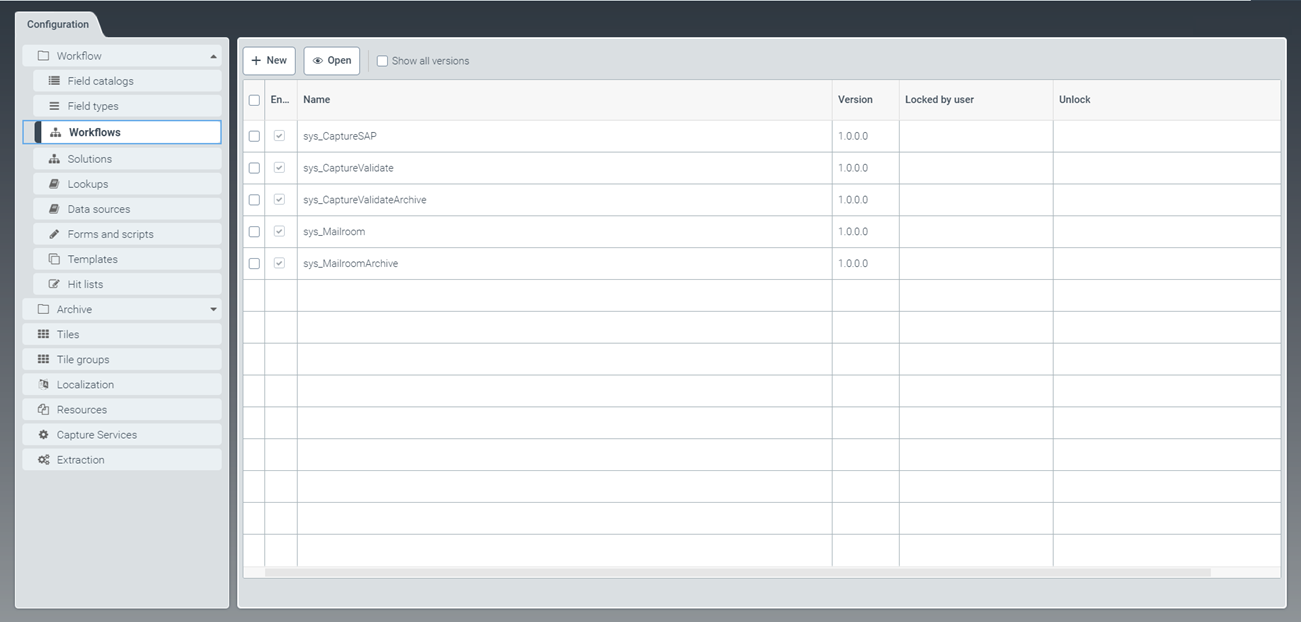 |
From the Workflows tab, you can create new workflows or adapt workflows based on standard ones (i.e. those whose names are prepended with sys_). For more information, see Editing a workflow (V1) and Creating a workflow (V1).
Creating a workflow (V1)
From the configuration menu, open the Workflows window and click New.
➣ The tab Workflow: New Workflow will open.
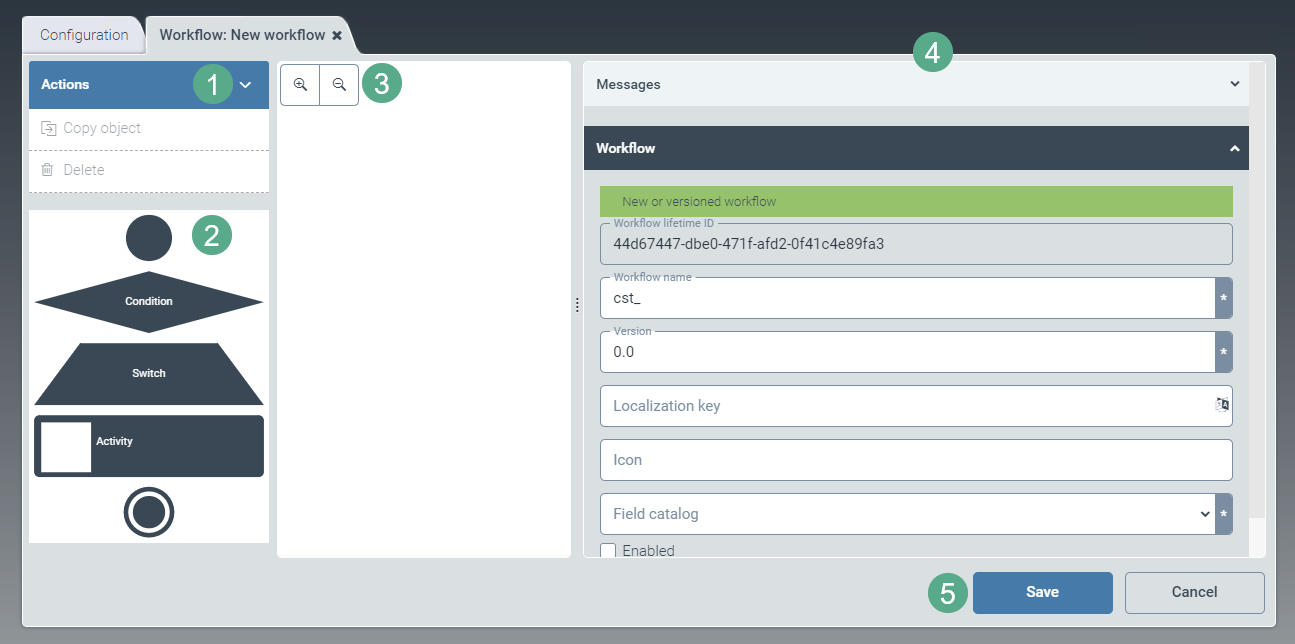
In the Workflow panel, edit the fields (shown below). When you are finished, select the check box Enabled below the fields to enable the new workflow.
Column/Category
Instructions
Workflow name
Enter the technical name of the workflow.
Notice
The technical name comes prepended with cst_. This prefix cannot be deleted.
Version
Specify the workflow version.
The version must always have the format major.minor.patch.build. All elements must be numeric. The final two elements are optional.
Localization key
Enter the localization key for the workflow's display name.
To open the Select localization dialog box, click the
 button.
For more information, see Selecting a localization.
Icon
Select an icon key. The icon key determines which icon will represent the workflow.
Upload the icon under the Resources menu item. For more information, see Creating a resource.
Field catalog
Choose a field catalog from a drop-down list.
Enabled
If necessary, activate the check box to release the workflow.
Notice
A workflow cannot be used in the system unless it has been released.
Create the workflow by dragging and dropping the required workflow elements (2) into the pane to the right (3).
Select from the following elements (2):
Element
Description

Creates a start node for your workflow. The start node defines the beginning of the process. Each workflow must contain exactly one start node.
xSuite Interface will trigger the workflow, which starts at the node that has been defined as the starting point.

Used to add a condition to your workflow. How the workflow proceeds depends on the fulfillment of the condition in this step (2 options – true or false).

Use this to add a switch to your workflow. The rest of the workflow depends on the fulfillment of the condition in this step. The condition can be met in different ways (n options).
If you have activated the Post activity switch, the results of the previous activity will be queried.

Adds an activity to the workflow, such as classifying or validating documents.

Creates an end node for your workflow. Each workflow must contain exactly one end node. The end node marks the completion of the workflow.
To remove an element, select the element and press Del.
To get a better view of the workflow, use the
 and
and  buttons to zoom in and out.
Click on a workflow item.
➣ On the right side of the screen (4), an accordion will appear with detailed information and setting options for the selected workflow element.
Depending on the workflow element, one or more of the following panes will open:
Message (for more information, see Messages)
Start node (more information in Start node), Switch (more information in Switch), Condition (more information in Condition), Activity (more information in Activity), or End node (more information in End node).
Instance (more information in Instance)
Access control (more information in Access control)
User exit on load (more information in User exit on load)
User exit on save (more information in User exit on save)
Click Save to save the workflow you have created, or click Cancel (5) to discard it.
Editing a workflow (V1)
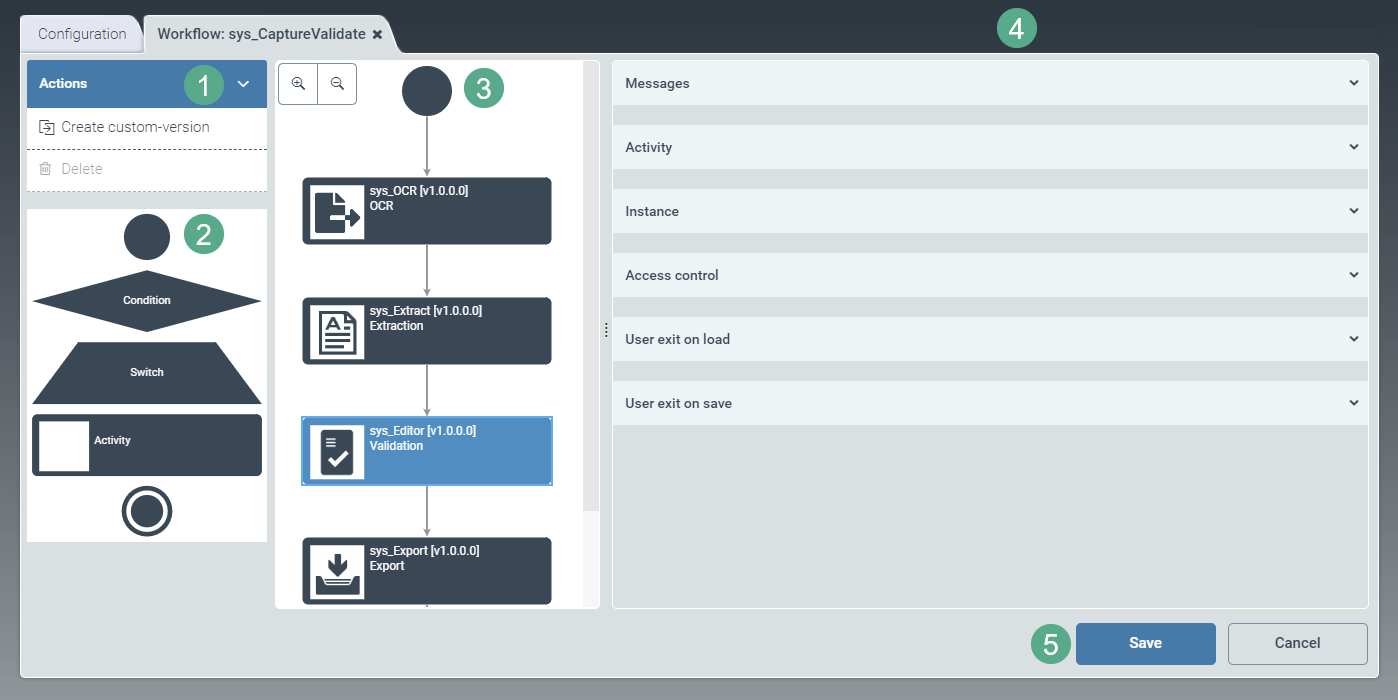
To open a workflow, click the Workflows tab in the sidebar.
➣ The Workflow:{Workflow name} window will open.
Notice
Standard workflows with the prefix sys_ cannot be edited until specific steps have been taken, as follows:
To create a custom version, click on the Create custom-version button.
Save the custom version.
Close the window and open it again.
Notice
The technical name comes prepended with cst_. This prefix cannot be deleted.
Edit the workflow by dragging and dropping the required workflow elements (2) to the pane containing the workflow diagram (3).
Select from the following elements (2):
Element
Description
Creates a start node for your workflow. The start node defines the beginning of the process. Each workflow must contain exactly one start node.
xSuite Interface triggers the workflow, which starts at the node that has been defined as the starting point.
Used to add a condition to your workflow. How the workflow proceeds depends on the fulfillment of the condition in this step (2 options – true or false).
Use this to add a switch to your workflow. The rest of the workflow depends on the fulfillment of the condition in this step. The condition can be met in different ways (n options).
If you have activated the Post activity switch, the results of the previous activity will be queried.
Adds an activity to the workflow, such as classifying or validating documents.
Creates an end node for your workflow. Each workflow must contain exactly one end node. The end node marks the completion of the workflow.
To remove an element, select the element and press Del.
To get a better view of the workflow, use the
and buttons to zoom in and out.Click on a workflow item.
➣ On the right side of the screen (4), an accordion will appear with detailed information and setting options for the selected workflow element.
Depending on the workflow element, one or more of the following panes will open:
Message (for more information, see Messages)
Start node (more information in Start node), Switch (more information in Switch), Condition (more information in Condition), Activity (more information in Activity), or End node (more information in End node).
Instance (more information in Instance)
Access control (more information in Access control)
User exit on load (more information in User exit on load)
User exit on save (more information in User exit on save)
Edit the items as needed.
Click Save to save the workflow you have edited, or click Cancel (5) to discard all changes.
If a workflow has already been saved, you can use the Delete button (1) to delete it in its entirety.
Messages
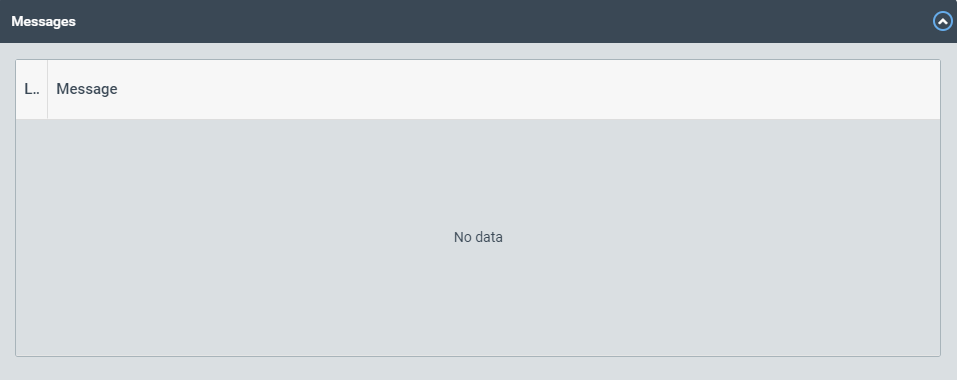 |
This panel shows notifications indicating the reason why activating or saving the workflow has been prevented. Reasons for blocks might include missing licenses or differing workflow versions.
Start node
 |
The panel Start node contains a short description of the workflow element. This description cannot be changed.
For more information on the start node, see the overview of workflow elements in Chapter Editing a workflow (V1) or Creating a workflow (V1).
Condition
In order for a workflow to continue, a condition must be fulfilled. The course the workflow takes depends on whether the condition meets with a response of true or of false.
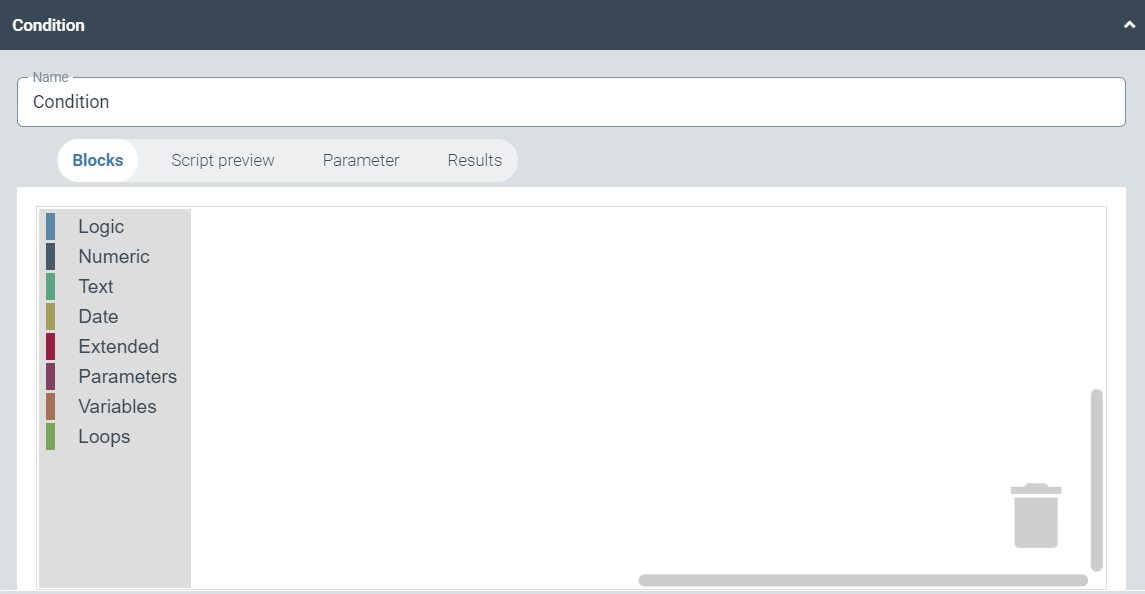 |
To change data at defined entry points of workflow activities or workflow conditions, or to add dynamism to the workflow process, use user exits.
For more information on the tabs Blocks, Script preview, Parameter and Results, see User exit on load.
Switch
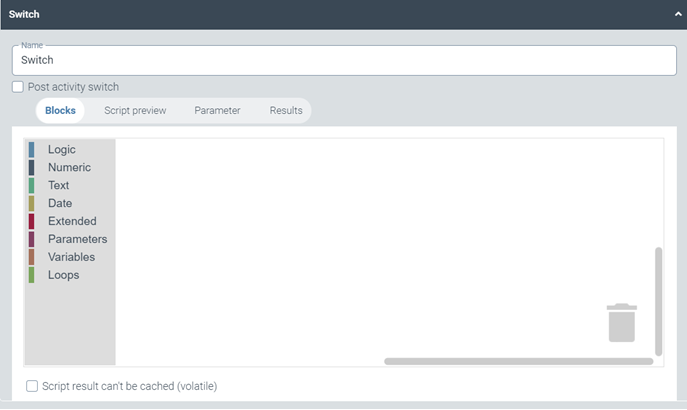 |
To change data at defined entry points of workflow activities or workflow conditions, or to add dynamism to the workflow process, use user exits.
For more information on the tabs Blocks, Script preview, Parameter and Results, see User exit on load.
When selected, the check box Post activity switch determines that the results from the previous activity will be used for the evaluation.
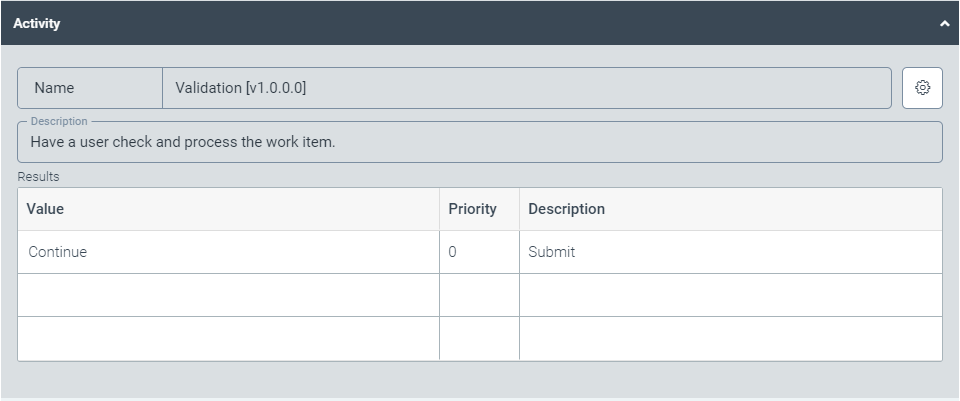
Activity
 |
Notice
Changes can only be made to a custom version previously created using the corresponding button in the action menu.
Notice
The technical name comes prepended with cst_. This prefix cannot be deleted.
The Activity panel identifies the workflow activity by name and offers a description.
The results from the Results table are determined by the activity type. The results cannot be edited.
To change activity parameters, use the  button.
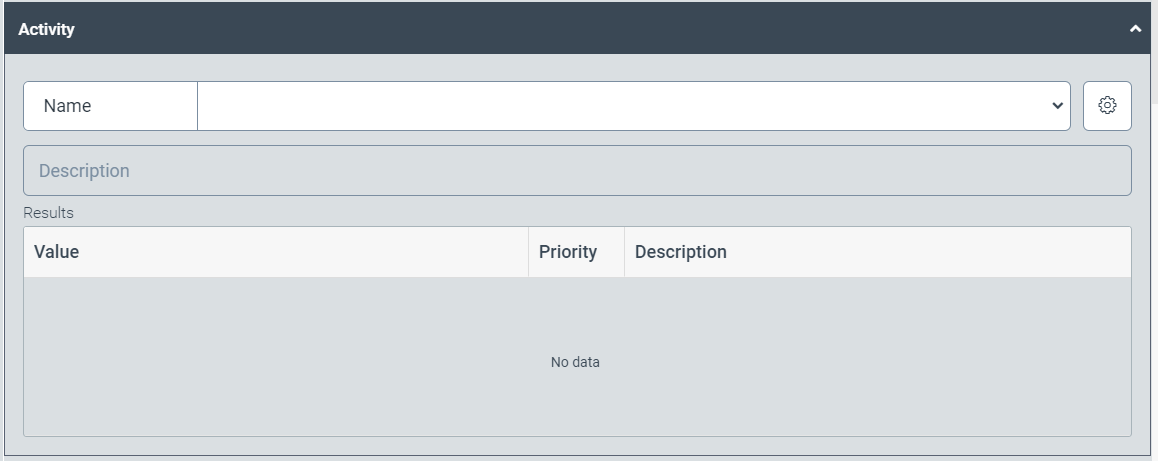 |
An activity type can be selected from the drop-down menu. The respective description will appear in the Description field.
The results from the Results table are determined by the activity type. The results cannot be edited.
To change activity parameters, use the button.
End node
 |
The End node panel contains a description of the workflow element. This description cannot be changed.
For more information on the end node, see the overview of workflow elements in Chapter Editing a workflow (V1) or Creating a workflow (V1).
Instance
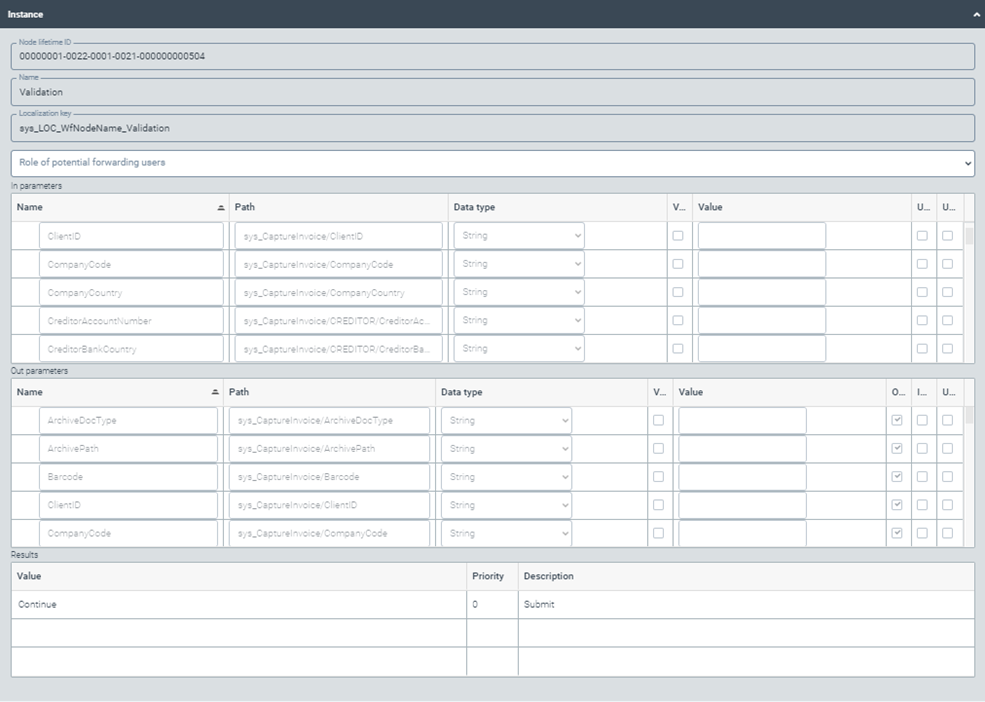 |
In the Instance panel, you can edit the following fields:
Name of instance
Localization key
Changes to parameters can be made in the tables In parameters and Out parameters:
In parameters are passed on from the previous activity.
Out parameters are passed on to the next activity.
Column | Action |
|---|---|
Name | Define the name of a parameter in the fields of this column. |
Path | Click on a cell in the table if you wish to open a selection of field catalog entries. |
Data type | Select a data type from the drop-down list. |
V...(Value enabled) | Select the check box in this column if you wish to activate use of the default value when work items are processed. |
Value | Enter the default value here. |
U... (Used for form selection) | Select the check box to make these parameters available in the tab Forms and Scripts → Forms (View Info) → Edit Usage dialog → Value List. To open the Edit Usage dialog box, Click the Add button. |
U... (Used in script) | Select the check box in this column to be able to use this parameter in user exit scripts. |
O...(Optional: May be omitted when passing parameters.) | If you select the check box in this column, the Out parameter will not be mandatory for a working workflow; no error message will appear in the case of an empty field within the parameter, or if the parameter is not passed on. |
I...(Ignored: Value will not be saved anywhere.) | If you select the check box in this column, the value of the Out parameter will not be saved. |
The following buttons are provided for editing parameters:
Button | How it works |
|---|---|
 | Adds a line. |
 | Opens the dialog box Select field catalog entries. If you open the field catalog with |
 | Removes entries line by line. |
 | Copies table rows. |
 | Pastes copied table rows. |

Your results will appear in the lower pane.
The results from the Results table are determined by the activity type. Results cannot be edited.
Access control
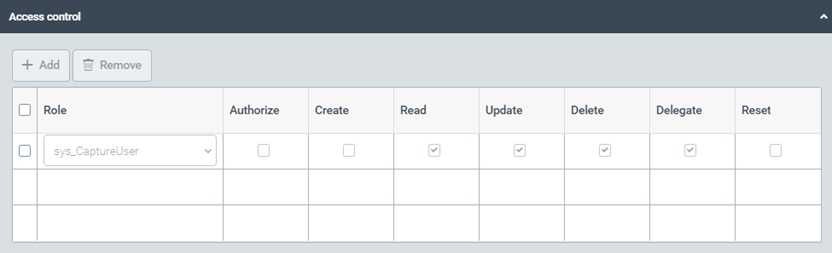 |
The Access control panel is where user roles and access to work items are defined.
Select from the following types of authorization:
Authorization | Description |
|---|---|
Create | Authorization to create work items |
Read | Unrestricted read rights to work items |
Update | Editing rights for work items |
Delete | Authorization to delete work items |
Delegate | Authorization to forward tasks |
Reset | Authorization to reset work items |
User exit on load
To change data at defined entry points of workflow activities or workflow conditions, or to add dynamism to the workflow process, use user exits.
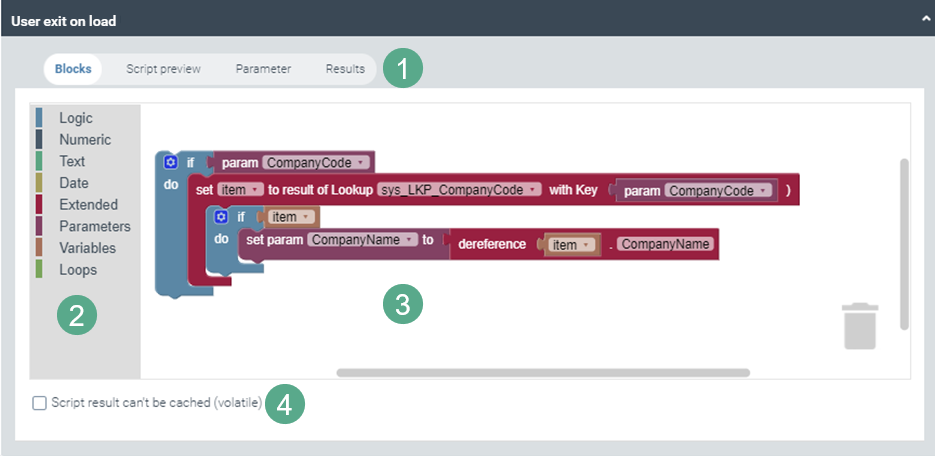 |
User exits on load are executed when the work item becomes part of the activity.
The scripts to be executed at loading can be viewed, edited and created either in the Blocks screen or in the Script preview screen, accessible from the toolbar (1).
In the block view, you can drag and drop elements from the sidebar (2) to the main panel (3) and use them to create the desired script.
To delete individual blocks, use the wastepaper basket icon in the lower right corner of the main panel (3).
The tab Script preview in the toolbar (1) shows the native JavaScript source code that corresponds to the blocks from the block view. The script view only serves to provide information; source code cannot be edited.
You can convert block scripts to native scripts (Edit script as text button), but you cannot switch back to the block view without discarding all your changes.
Notice
If you create user exits as native scripts, keep in mind that xSuite does not guarantee compatibility.
Activate the check box Script result can't be cached (volatile) if
The script depends on the current time (date and time).
The script generates a random output (Math.random).
To display and edit all In parameters (cf. Instance), click on the tab Parameters in the toolbar (1).
To see the activity's In parameters that are marked as Used in script, go to the Parameter tab. It provides access to these workflow parameters via script.
Free parameters can also be defined for use in the script.
If you use a switch or condition, return parameters in the script must be defined.
To see and edit the results, click on the tab Results in the toolbar (1).
For ease of editing, use the following buttons:
Button | How it works |
|---|---|
 | Adds a line. |
 | Removes entries line by line. |
 | Copies table rows. |
 | Pastes copied table rows. |
User exit on save
To change data at defined entry points of workflow activities or workflow conditions, or to add dynamism to the workflow process, use user exits.
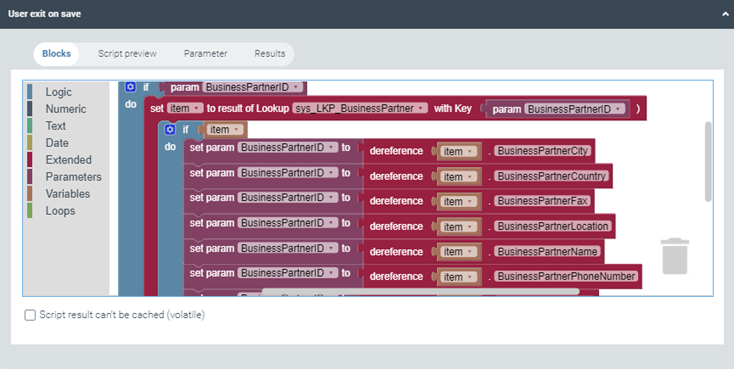 |
User exits on save are executed when the work item leaves the activity.
To see, edit, and create the scripts that are to be run at saving, go to the view Blocks or the view Script preview.
For more information on the tabs Blocks, Script preview, Parameter and Results, see User exit on load.