Document types
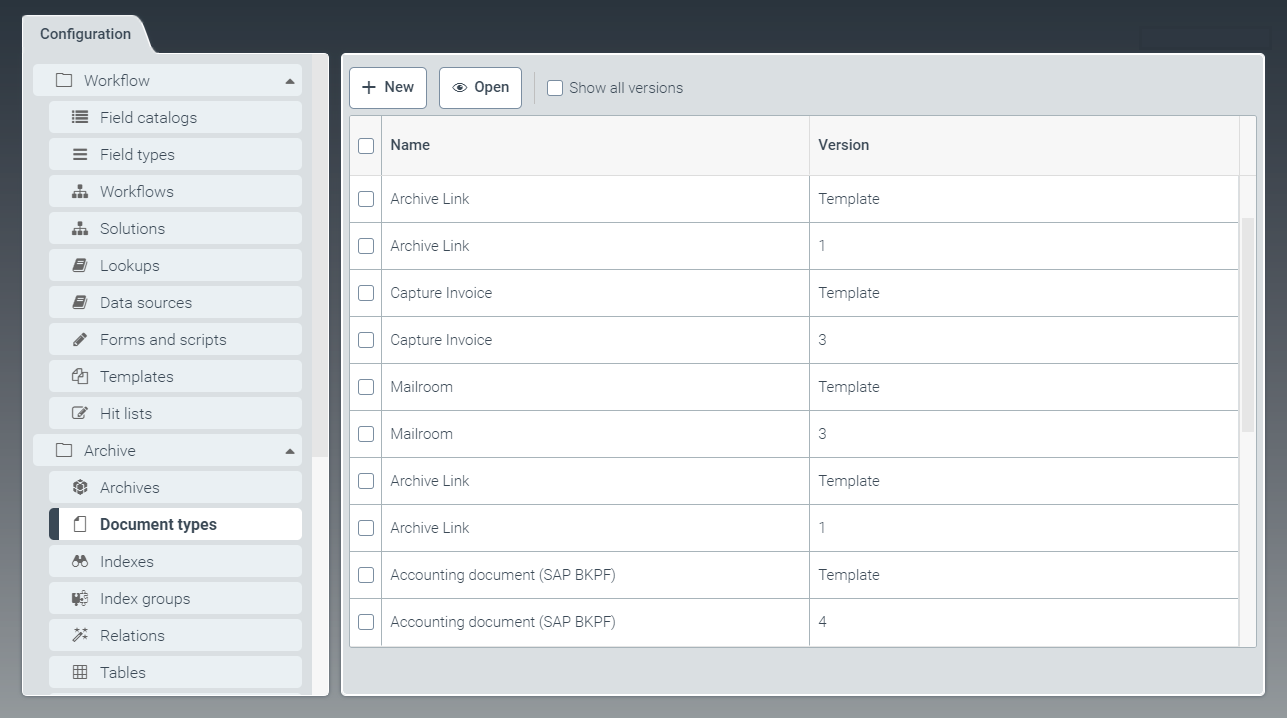 |
The tab Document types is for creating new document-type templates and editing existing document-type templates.
Document types form the schema of the index of an archive document. This is where the individual fields are defined that are to appear in an archive document.
Each version of a document type is based on the respective document-type template. Once a version of the document type has been created, it cannot be edited. To change a document type, you must edit the document-type template and create a new version.
To use a document type, there must be an active version of that document type.
Versioning prevents documents that have already been stored from becoming invalid due to a change to the fields of a document type.
Creating a document-type template
From the configuration menu, open the Document types window and click New.
➣ The DocType: Unnamed item window will open.
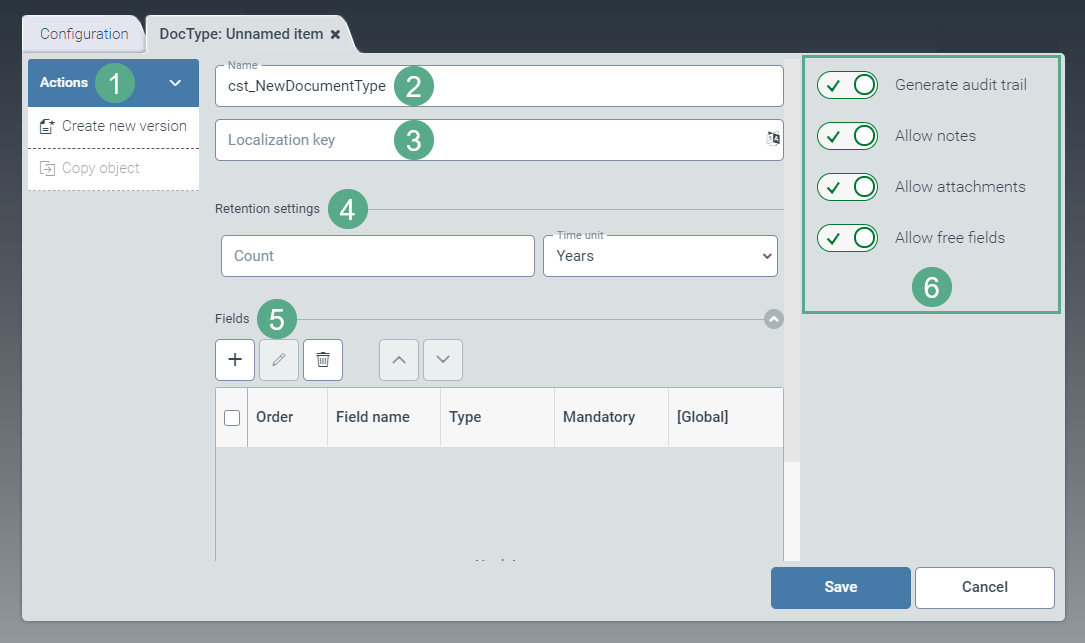
Specify the technical name of the document type in the Name field (2).
The prefix
cst_is predefined and cannot be changed.In the Localization key field (3), enter the localization key for the document-type name to be displayed.
To open the Select localization dialog box, click the
 button.
For more information, see Selecting a localization.
In the Retention settings pane (4), make changes to the following fields:
Field
Action
Count
Set the number indicating the retention time. The number relates to the time unit used.
Time unit
Set the time unit for the retention period.
Possible values:
Years,Months,DaysIn the Fields pane (5), add new fields.
For more information, see Document type - Adding a field.
If required, activate the following options in the pane on the right (6) using the toggle buttons:
Option
Action
Generate audit trail
Specifies whether an audit trail entry is to be created for each action.
Allow notes
Specify whether notes are to be allowed on the document.
Allow attachments
Specify whether file attachments are to be allowed for the document.
Allow free fields
Specify whether free fields are to be allowed.
If free fields are allowed, users will be able to create fields in the archive client that do not correspond to the field definitions of the document type.
However, if the user creates a free field that matches the name of a defined field, the defaults of the defined field will apply.
Click Save.
➤ The document-type template has now been created.
Notice
To create a document-type version based on the document-type template currently opened, click the option Create new version.
To use a document type in xSuite Helix, a version of this document type must exist.
Creating a document-type version
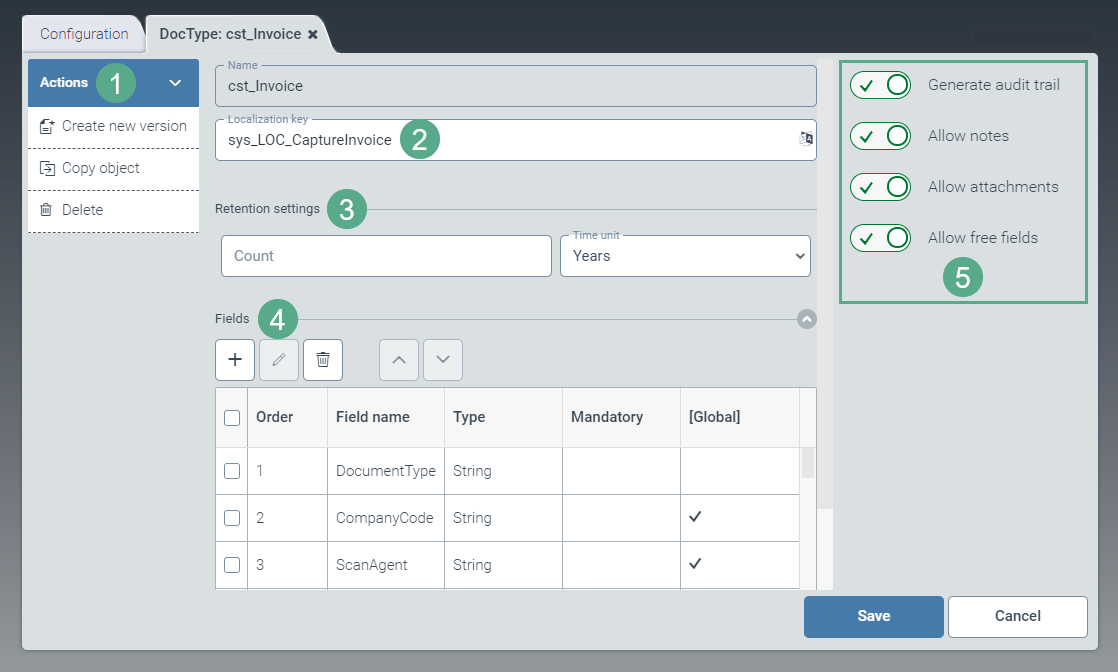
In the Document types tab, click on the table row of a custom document-type template (prefix cst_).
➣ The DocType: {Name of document type} window will open.
Notice
If a suitable document-type template does not exist, first create a new one.
For more information, see Creating a document-type template.
In the Retention settings pane (3), configure the following fields:
Field
Action
Count
Set the number indicating the retention time. The number relates to the time unit used.
Time unit
Set the time unit for the retention period.
Possible values:
Years,Months,DaysIn the Fields pane (4), add new fields, or edit or delete existing fields.
For more information, see Document type - Adding a field.
If required, activate the following options in the pane to the right (5) using the toggle buttons:
Option
Action
Generate audit trail
Specifies whether an audit trail entry is to be created for each action.
Allow notes
Specify whether notes are to be allowed on the document.
Allow attachments
Specify whether file attachments are to be allowed for the document.
Allow free fields
Specify whether free fields are to be allowed.
If free fields are allowed, users will be able to create fields in the archive client that do not correspond to the field definitions of the document type.
However, if the user creates a free field that matches the name of a defined field, the defaults of the defined field will apply.
In the action menu (1), click the option Create new version.
➣ The view will change to reflect the new document-type version.
➣ The version number will be automatically displayed in the Version field.
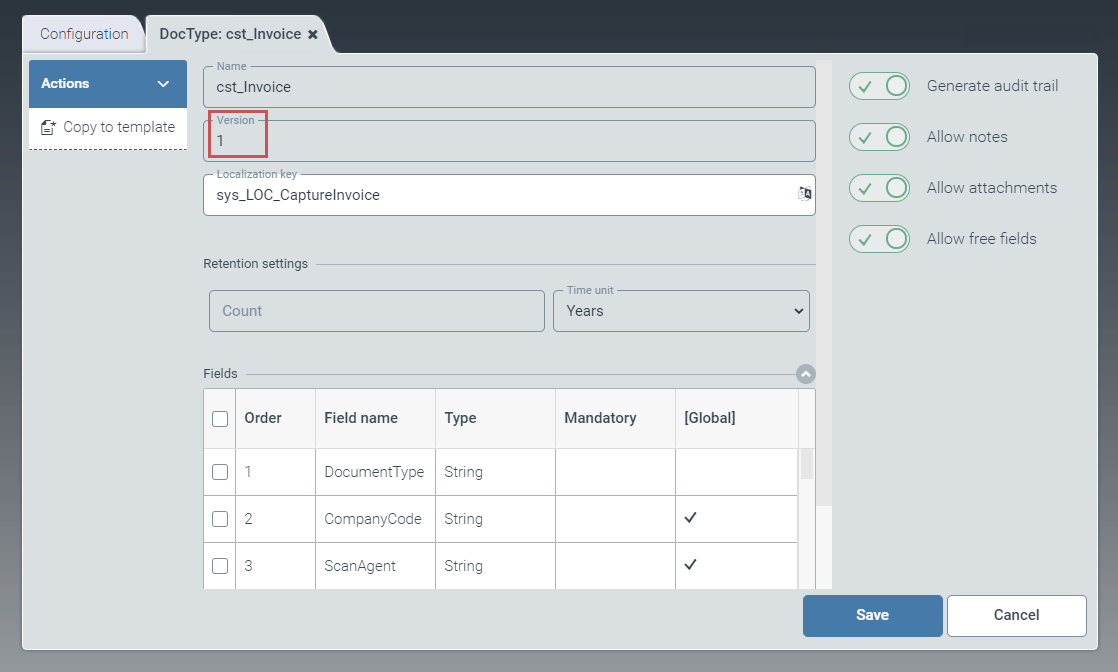
If necessary, go to the Localization key field (2) and alter the name to be displayed for the document type.
To open the Select localization dialog box, click the
button.For more information, see Selecting a localization.
Click Save.
➤ The new document-type version has now been created.
Notice
Click the option Copy to template to create a document-type template based on the document-type version currently open.
Document type - Adding a field
Click the
 button in the Fields pane.
➣ The Edit field dialog box will open.
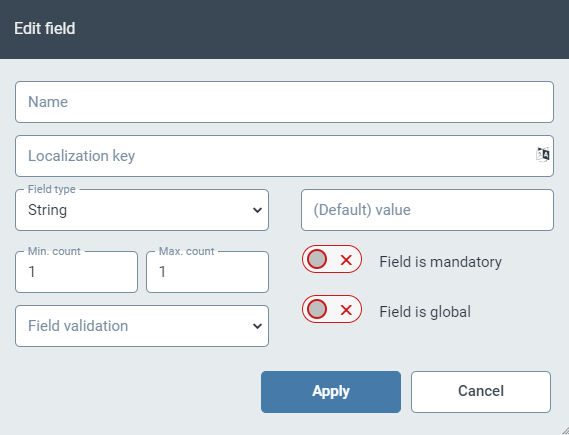
Specify the technical name of the field in the Name field.
In the field Localization key, enter the localization key for the field name to be displayed.
To open the Select localization dialog box, click the
button.For more information, see Selecting a localization.
In the dropdown list Field type, select the data type of the field.
Possible values:
StringAny text
BoolCheck box for yes/no selection
IntegerLong integer (64-bit)
DateDate
DecimalNumber with decimal places
TableReference to a table
In the (Default) value field, enter the name of the table to be used.
For more information, see Tables.
SuggestionSuggestion field; identical to
StringDuring indexing and searching, this field is used for suggestions.
Notice
You can add a maximum of one field of the type Suggestion.
LinkLink to another document or attachment
In the (Default) value field, set an initial value to populate the field.
Notice
Enter numerical values according to the convention in English, e.g.
1.5for the German numerical value1,5.As far as date values are concerned, the system will automatically recognize the date pattern.
In the fields Min. count and Max. count, determine the minimum and maximum number of values that the field is allowed to contain.
If required, select an operator from the dropdown list Field validation, and enter one or more values to create a validation rule for the field value.
For information on validation rules, see Validation rules for fields.
If necessary, activate the following options via the toggle buttons:
Field is mandatory: Defines the field as a mandatory field.
Field is global: Defines the field as a global field. Global fields can be used in all archives and indexes.
Validation rules for fields
Operator | Description |
|---|---|
| The value of the field must be larger than the value in the rule. |
| The value of the field must be smaller than the value in the rule. |
| The value of the field must correspond to the value in the rule. |
| The value of the field must be less than or equal to the value in the rule. |
| The value of the field must be greater than or equal to the value in the rule. |
| The rule consists of a list of values separated by a semicolon. The value of the field must contain at least one of the values from the rule. Example: If the rule is |
| The minimal length of a text of a field |
| The maximal length of a text of a field |
| Regular expression The text must correspond to this expression. |
| Regular expression Upper/lower case is ignored. |