Hit lists (V1)
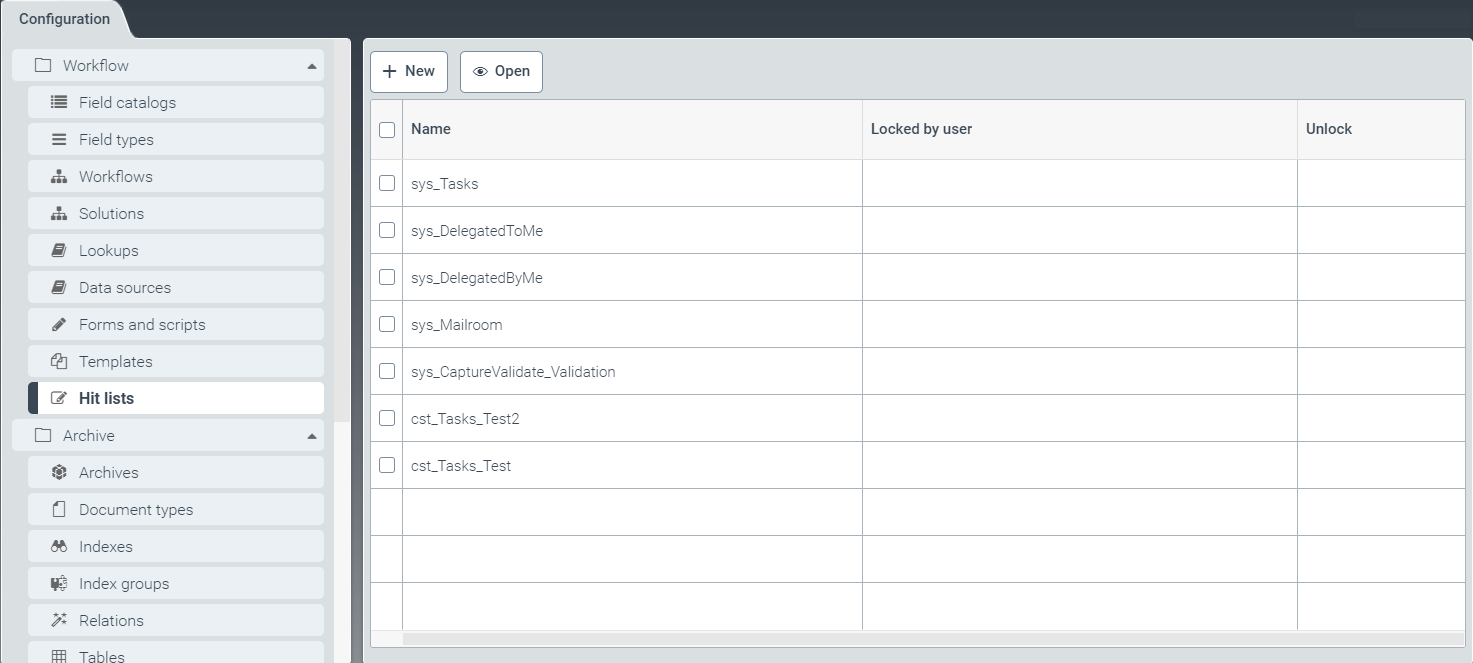 |
The tab Hit lists offers options for determining the scope of hit lists and how they are displayed. In addition, you can create new hit lists here.
Display of workitem lists is also configured in the Hit list window.
Creating a hit list
After opening the Hit lists tab, select a list by clicking on the respective line.
➣ The Hit list: New view window will open.
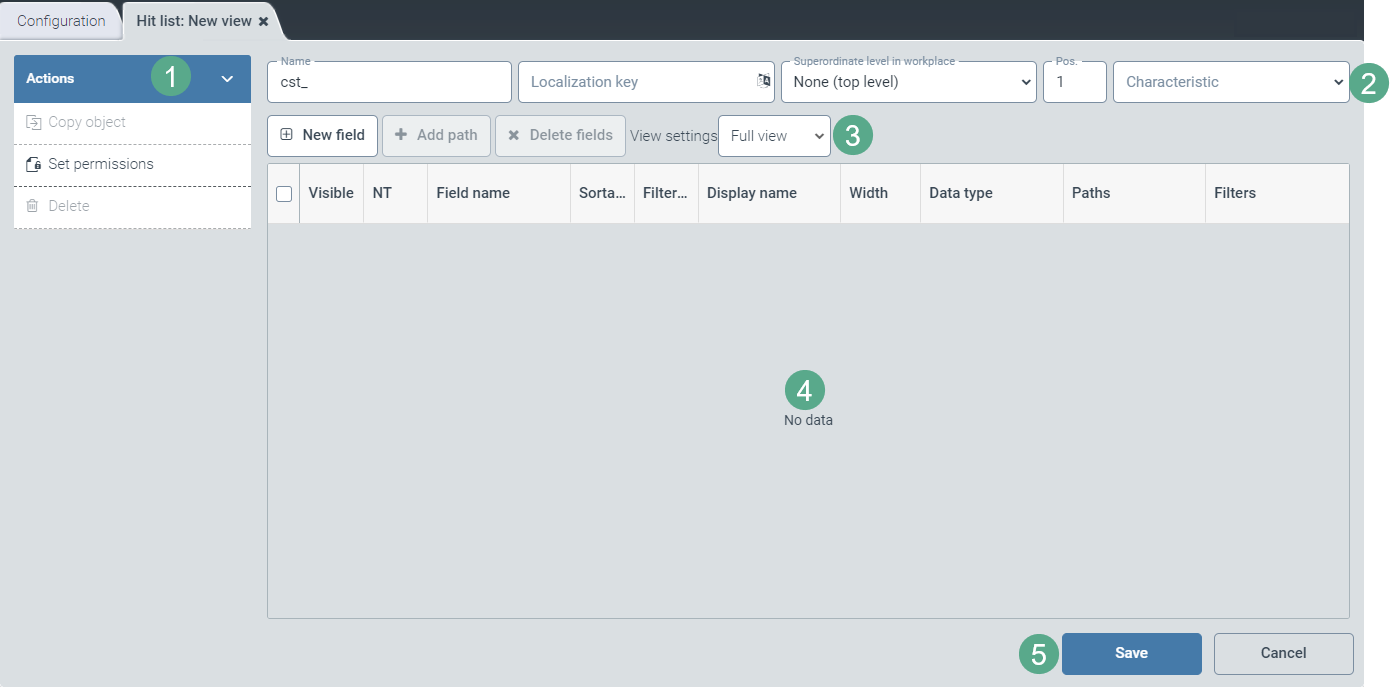
Enter the technical name of the hit list and, if required, the localization key, the superordinate level in the workplace, the position, and the characteristic (2).
Notice
The technical name comes prepended with cst_. This prefix cannot be deleted.
In the drop-down list Characteristic, you can select pre-defined filters which determine whether work items are displayed in the list view.
Click Set permissions in the action menu (1) and configure the authorizations Read, Update, Delete, Authorize for user and admin roles.
Create new fields, delete fields as needed, add a path to the corresponding field catalog entry, and select a view in which to display the fields in the hit list (3).
Complete the contents of the following columns in the summary table (4):
Notice
When recreating, the editable fields and check boxes will not appear until you have added at least one new line by clicking the button New field.
Column
Action
Visible
Activate this field to make it visible in the hit list.
NT
Enable this check box to filter the list by this field but not store the field itself in the database.
Field name
The name of the field to be filtered and/or according to which it should be sorted will appear in this free text field.
Edit this field and customize the technical name of the field.
Sortable
Select this check box to make sorting options available for the column to the user in the client.
Filterable
Select the check box to make filter options for the column available to the user in the client.
Display name
The technical name of the field to be filtered and/or according to which it should be sorted will appear in this free text field.
Customize the field name here.
Width
Enter the future column width in pixels in this free text field.
Data type
This free text field displays the data type of the field to be filtered and/or by which it is to be sorted. No action required.
Paths
The path of the field to be filtered and/or according to which it should be sorted will appear in this free text field. No action required.
Filters
Edit the filter with the
 button by selecting an operator and using a free text field.
Click Save to save the hit list, or click Cancel (5) to discard the draft.
Notice
After editing and saving, the options Copy object and Delete will also appear in the action menu (1).
To create a copy of the hit list currently open, click Copy object. The copy will be identified with the suffix _Copy postpended to the name of the hit list.
Click Delete to delete a saved template.
Editing a hit list
In the Hit lists tab, click on the table row of the list you wish to view.
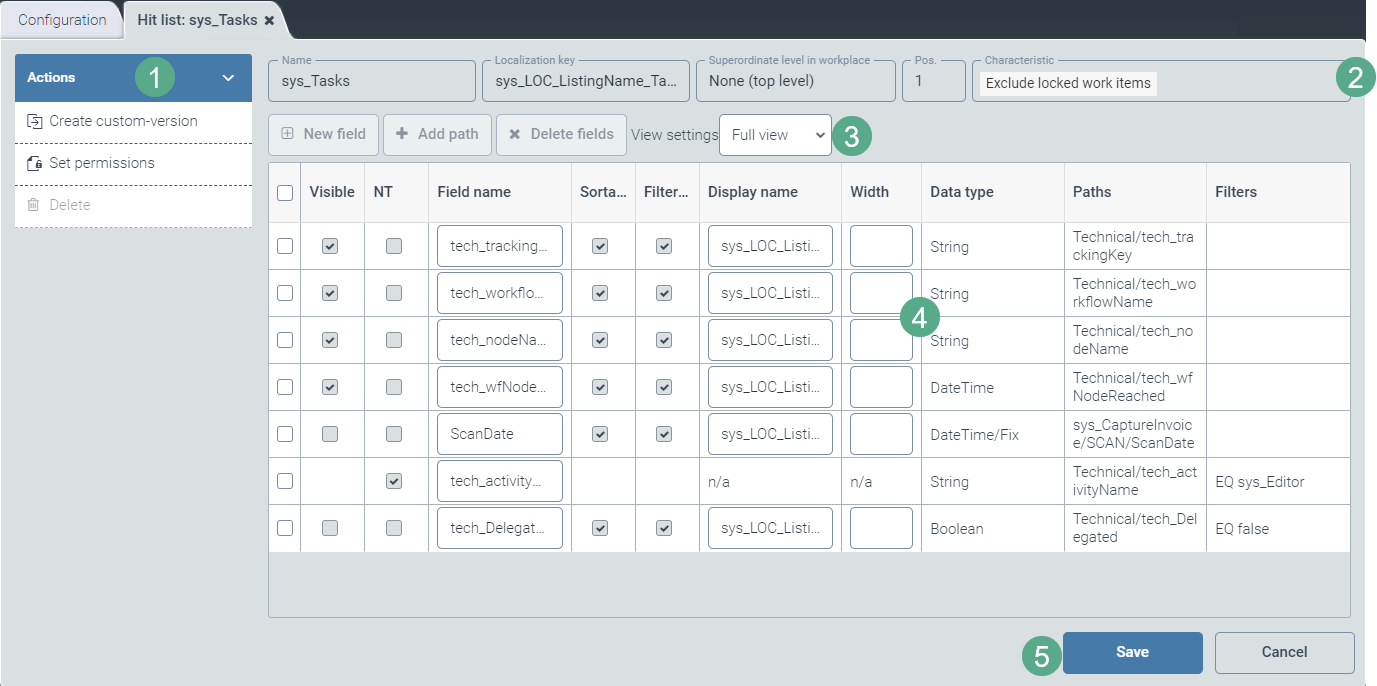
➣ The Hit list: {Name of the hit list} window will open.
Notice
Standard hit lists with the prefix sys_ cannot be edited until specific steps have been taken, as follows:
Click the button Create custom-version to create a custom version.
Save the custom version.
Close the window and open it again.
In the action menu (1), click Create custom-version.
➣ An editable custom version will now be available.
Edit the technical name of the hit list and, if required, the localization key, the superior level in the workplace, the position, and the characteristic (2).
In the drop-down list Characteristic, you can select pre-defined filters which determine whether work items are displayed in the list view.
Notice
The technical name comes prepended with cst_. This prefix cannot be deleted.
Click Set permissions in the action menu (1) and configure the authorizations Read, Update, Delete, Authorize for user and admin roles.
Create new fields as needed, delete fields, add a path to the corresponding field catalog entry, and select a view in which to display the fields in the hit list (3).
In the overview (4), make changes to the contents of the columns as required:
Column
Action
Visible
Activate this field to make it visible in the hit list.
NT
Enable this check box to filter the list by this field but not store the field itself in the database.
Field name
The name of the field to be filtered and/or according to which it should be sorted will appear in this free text field.
Edit this field and customize the technical name of the field.
Sortable
Select this check box to make sorting options available for the column to the user in the client.
Filterable
Select the check box to make filter options for the column available to the user in the client.
Display name
The technical name of the field to be filtered and/or according to which it should be sorted will appear in this free text field.
Customize the field name here.
Width
Enter the future column width in pixels in this free text field.
Data type
This free text field displays the data type of the field to be filtered and/or by which it is to be sorted. No action required.
Paths
The path of the field to be filtered and/or according to which it should be sorted will appear in this free text field. No action required.
Filters
Edit the filter with the
button by selecting an operator and using a free text field.Click Save to save the modified hit list, or click Cancel (5) to discard changes.
Notice
After editing and saving, the options Copy object and Delete will also appear in the action menu (1).
To create a copy of the hit list currently open, click Copy object. The copy will be identified with the suffix _Copy postpended to the name of the hit list.
Click Delete to delete a saved hit list.