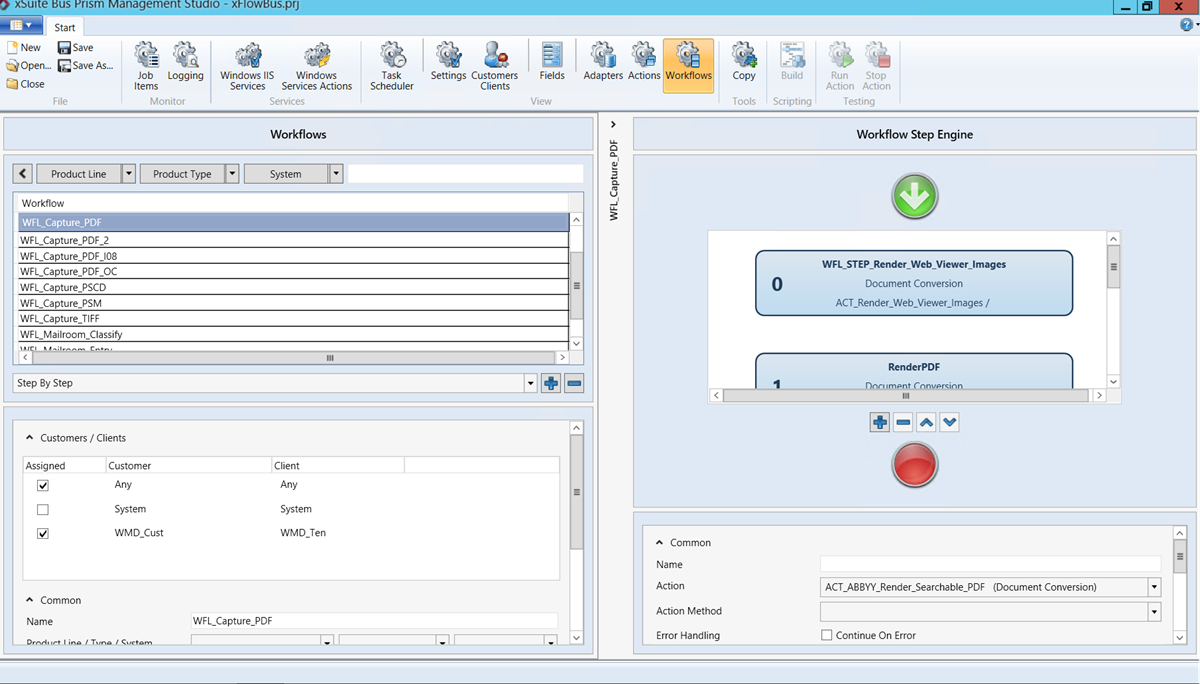
Workflows
Use the Workflows tab to create and configure internal xSuite Bus workflows. xSuite Bus allows you to bundle previously configured actions into workflows.
This is useful for coordinating different interdependent actions in order to ensure a smooth overall process.
 |
xSuite Bus Prism is delivered with various workflows tailored for use with the xSuite product family. All you need to do is adapt these templates to your specific system. To make these workflows easier to understand, we offer the example of the xSuite Capture workflow used for data extraction and transfer of documents to an ERP system like SAP ERP.
The list of workflows details all workflows included in the xSuite Bus package. If you wish to add a new workflow, click the  button. The
  button allows you to remove the selected workflow from the list.
You will find general settings for the selected workflow located below the list.
 |
Field | Description |
|---|---|
Customers / Clients | Define which customers and clients to assign to the workflow. All entries in the Customers Clients tab are available for this step. |
Common | Make general workflow settings. |
Name | Specify the name of the workflow as it is to appear in the workflow list. |
Product Line/Type/System | Set the values for the filter options. The following values are available for selection for each category:
|
Finalize | Trigger deletion of the item that was processed in the workflow after the workflow has been completed. This will not affect any data or images involved in the workflow. In an xSuite Capture scenario that only uses xSuite Interface and xSuite Bus, finalization should not be performed on the xSuite Bus side, but rather by xSuite Interface. |
Queue Duration Timeout Sec. | Define the number of seconds in the queue until the workflow sends a timeout to xSuite Bus. NoticeThe value should always be set to a high value at the beginning, e.g., This will prevent transactions from being lost in the case of error and allow them to be fixed within the system by the xSuite Bus administrator. If errors are not fixed at this stage, then they must be handled in the subsequent systems. |
Description | Enter text describing the workflow. |
Each workflow has a start and an end point. Use the button to add a workflow step or use the button to remove the selected workflow step. You can move the selected workflow step one level up or down using the arrow-up/down button.
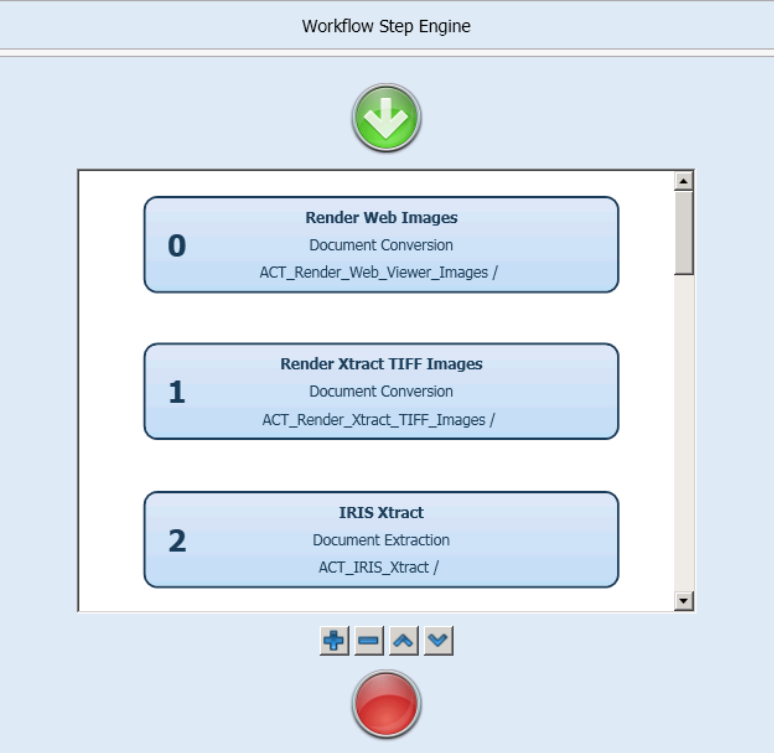 |
In the workflow described here, the file type of the received document is first converted to make the document available to the xSuite Viewer. Next, the document is converted to a TIFF format required by the document extraction process; the TIFF document is then handed over to the data extraction component, which returns the extraction results to xSuite Bus.
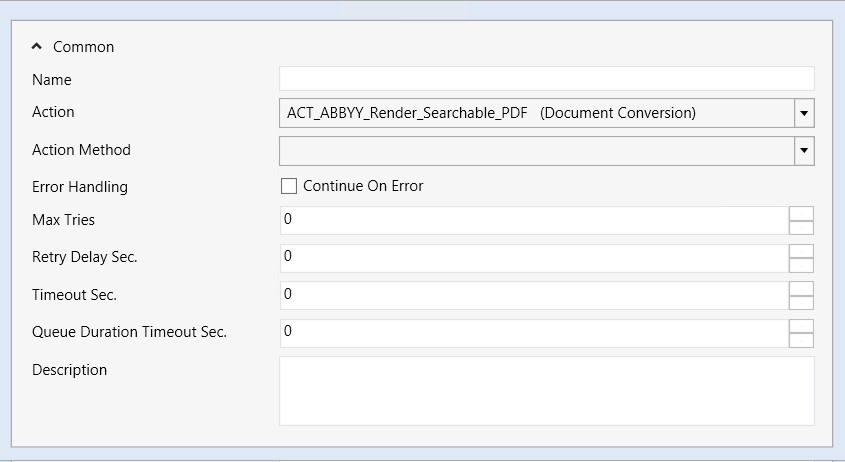
For each workflow step, there is a configuration section below the workflow sequence view for configuring the individual workflow steps.
 |
Field | Description |
|---|---|
Name | Enter the individual name of the workflow step. |
Action | Specify the action configured in the Actions tab to be executed in this workflow step. |
Action Method | Specify the action method to be used for executing the workflow step. Note: Not every action has separate methods. Action Methods must be entered manually. Which methods an action has can be checked in the Windows IIS Services tab. |
Error Handling | Indicate whether the workflow is to continue after a failed attempt by checking or clearing the Continue On Error check box. |
Max Tries | Define the maximum number of times a workflow may run if an error is encountered. |
Retry Delay Sec. | Define the delay in seconds before a new attempt of executing the workflow step may be started. |
Retry Timeout Sec. | Define the number of seconds before an attempt to execute the workflow step times out. |
Queue Duration Timeout Sec. | Time in seconds the system must wait after a timeout. |
Description | Enter a description of the workflow step. |