The "Administration" configuration node
The "TenantMappings" configuration node
Tenant mapping is used to manage the relationship between customers and tenants, especially in the context of xSuite Encore Prism. As the archive system only recognizes tenants that are customers and tenants of xSuite Encore, this combination must be mapped to an archive tenant. The tenant id mapped with the structure Encore-Tenant:Archive-Tenant.
For more information, see AuthorityCore.
The "Tenants" configuration node
In the Tenants configuration node, you can create new tenants and delete existing tenants.
Caution
Deleting a tenant will only remove the configuration data for this tenant. The archived data and the indexes of the tenant will not be deleted.
To delete the data of a tenant, log in to this tenant before deleting. Use the "Drop" tool to delete the archive data and the index data.
A tenant is a self-contained unit in the archive. Each tenant can have different users and groups. Tenants are created and deleted under Encore administration → Manage customers/tenants.
The archive itself does not work with customers ("Customer"). The archive tenant always consists of a combination of customer and tenant (CUSTOMER_TENANT). As the system administrator, you can restrict which administrative functions are available for each tenant. You can only make this configuration in the default tenant.
Use the Copy from property to copy the global configuration or the configuration of another tenant. To ensure that the index names and directories are not copied 1:1, for some of the nodes only copy the root nodes. To select the sub nodes that are not to be copied, use the Exclude sub nodes property.
 |
Notice
Once you have created an xSuite Archive tenant, create a tenant in xSuite Encore Prism, possibly with a different name. Enter both tenant names in the configuration node "TenantMappings" configuration node.
The "Translator" configuration node
Notice
The translation service has a cache time of 10 minutes. Language changes are only visible after cache time has expired.
All texts that are displayed in xSuite Archive Prism are available in the Translator configuration node. This includes, for example, field names, button labels and server messages.
The texts are divided into the different languages in the sub-nodes. For example, the de sub-node contains the German texts, and the en sub-node contains the English texts.
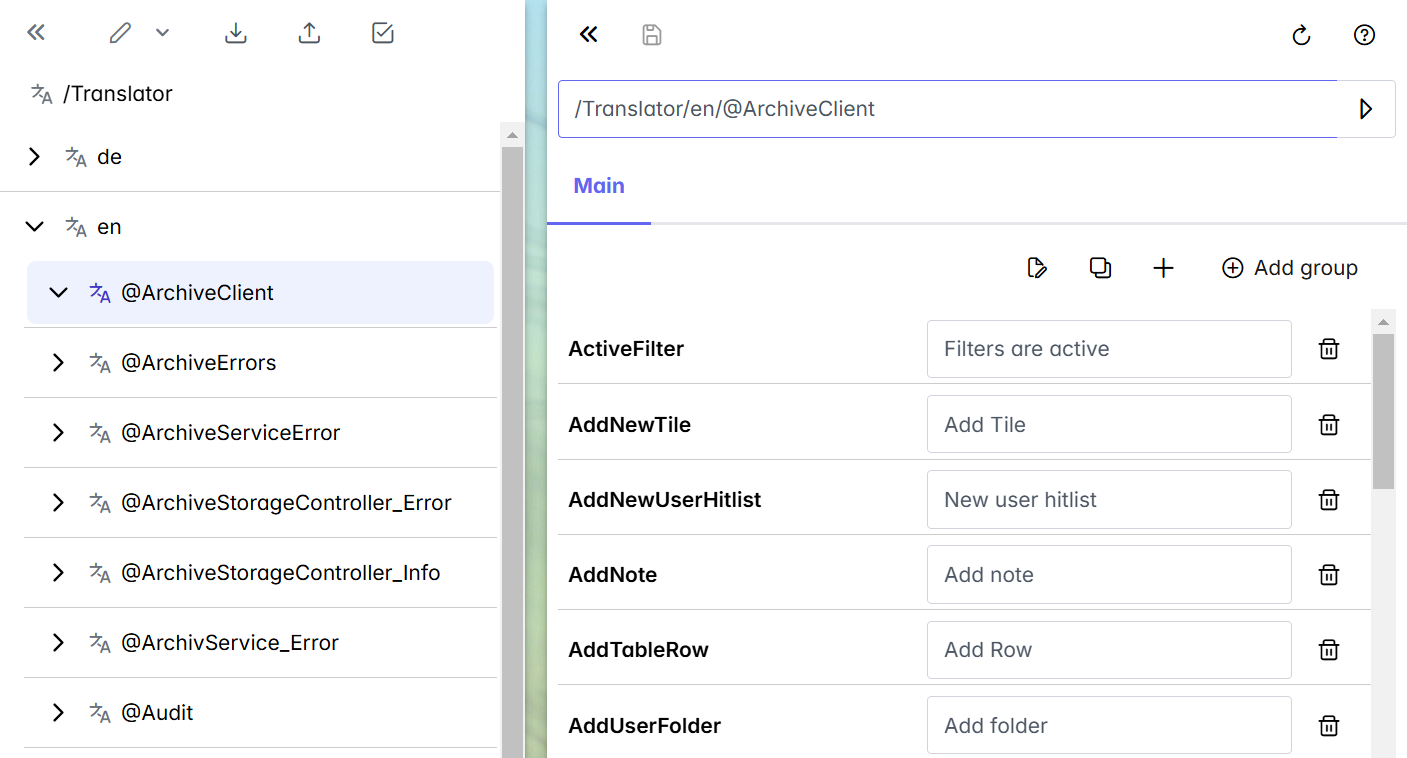 |
The texts for each xSuite Archive Prism module are subdivided below the languages. The modules always begin with an "at" sign (@), e.g., @ArchiveClient.
You can edit existing texts and add translations for new languages. By default, a user who logs in with the language en-US, en-GB, or another form of the English language will have the language en. You can create a GB node under en. In this node, you will only need to change the texts that contain differences in the root node.
Notice
The user can select the languages you have defined via the user menu.
The "Userroles" configuration node
In the Userroles configuration node, you can administer roles for internal users of xSuite Archive Prism. These users are only intended for B2B applications. No user role is defined in the standard system.
Creating a user role
Notice
When you create a new user role, the default password is admin. Change this password.
Open Archive Administration.
Open the configuration node Administration → Userroles.
Click on the button
 and then go to Create new node.
➣ The Create new node dialog will open.

Enter a name for the user role.
Click on Confirm.
Notice
To open the properties of the user role directly after creating it, activate the Open node afterwards checkbox.
Caution
Since this new user role has not yet been assigned any specific xSuite Archive roles, it has all authorizations.
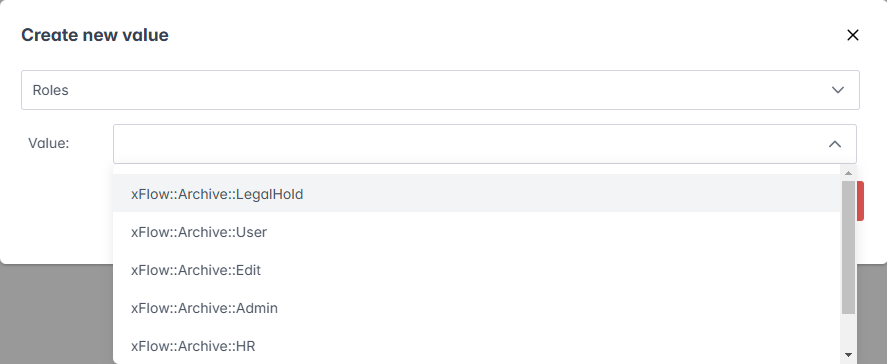
Click on Add value
 .
.➣ The Create new value dialog will open.
Select the Roles value and then select an xSuite Archive role.
Notice
To assign multiple xSuite Archive roles to the user role, add the Roles value as many times as necessary.
Click
 Save.
Save.➤ The user role has now been created.