Creating a new workflow group
The user-administration functions for workflow groups allow you to create new groups and add users to them.
On the start page, click on the tile Workflow Agents.
➣ User administration will open.
Click on the tile Groups.
Click the button
 Create Group.
➣ The dialog Create Group will open.
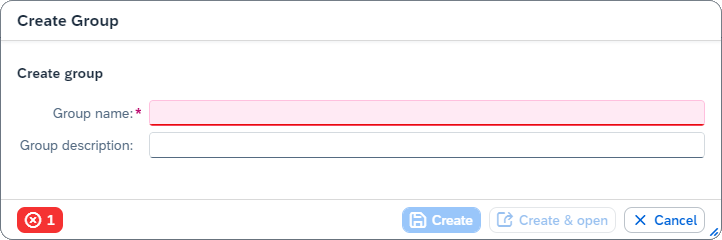
In the field Group name, enter a name for the group.
In the field Group description, you can enter a short description of the group.
Click Create.
Notice
To open the group right after it has been created, click Create & open.
➤ The group has now been created.
Adding a user to a group
Open the data of a group.
Click
 Edit.
Edit.➣ The group data can now be edited.
In the Group Members area, click the button
Create Group.➣ The dialog Select: Workflow Agents will open.
From the list of available users, select the users to be added to the group.
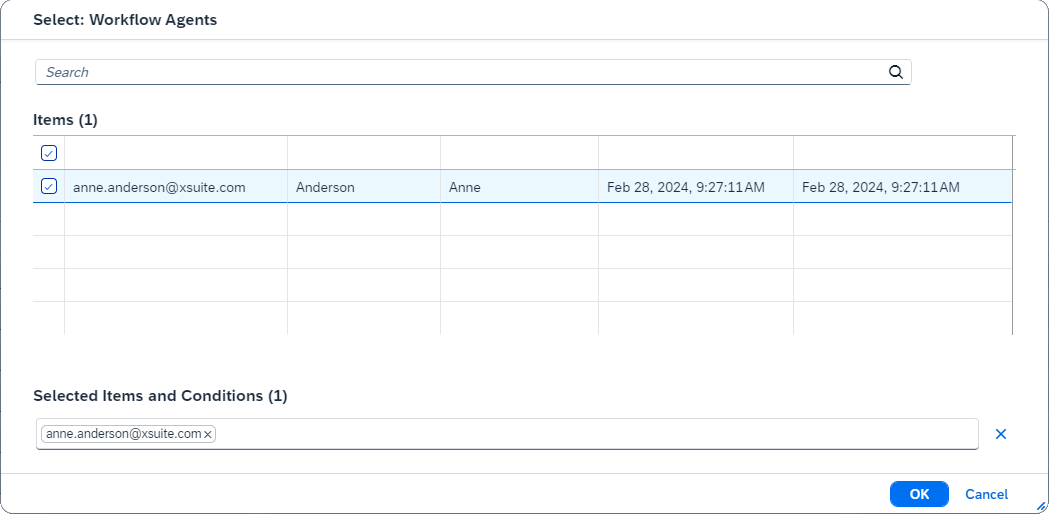
Click OK.
➣ The selected users will now appear in the list.

Click
 Save and exit editing.
➤ The selected users have now been assigned to the group.
Deleting a user from a group
Open the data of a group.
Click
Edit.➣ The group data can now be edited.
In the list, select one or more users to be deleted from the group.

In the Group Members area, click the button
 Delete Group.
Click
Save and exit editing.➤ The selected users have now been deleted from the group.